Latest version: SimpatiQCo v1.3.2c
SimpatiQCo is a free software suite running on a local server for your research group or service facility.
Through a web interface, it allows everyone to upload raw or wiff files (please see list of supported instruments below), stemming from a Thermo mass spectrometer or an ABI Sciex mass spectrometer respectively.
The software will then analyse the raw file, extract data (ion injection times, scan times,...) and will also do a Mascot search if a Mascot-server is available. All data (from the raw file and search results) is then stored in a database, which is accessable through the web interface to view several values and graphs for the current run, but also to view long-term data over a time course.
It is therefore easy to plot e.g. PSMs vs. retention time, to plot the lock mass deviation over a whole run, or to create a plot viewing the sequence coverage of a certain protein over a long time period.
| Version | Date | Remarks |
|---|---|---|
| 1.3.2c | 2015-02-16 | Some bug fixes. |
| 1.3.2b | 2015-02-16 | Some bug fixes. |
| 1.3.2 | 2014-09-29 | Some bug fixes. |
| 1.3.0 | 2014-08-19 |
|
| 1.1.8 | 2014-01-01 |
|
| 1.1.7 | Some bug fixes | |
| 1.1.6 | 1th March 2013 |
|
| 1.1.6 (Christine Hoogland edition) | As version 1.1.6 but with some changes made by Christine Hoogland (Queensland Institute of Medical Research):
|
|
| 1.1.2 |
|
|
| 1.1.1 |
FWHM Intesity Retention time at apex |
|
| 1.1.0 |
|
|
| 1.0.7 |
|
|
| 1.0.6 |
|
|
| 1.0.4 |
|
Please note: If you use or install simpatiQCo, you agree to the licenses in the "Licenses" directory (included in the download).
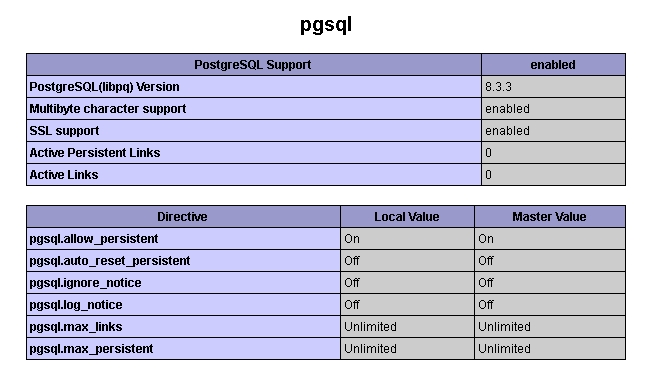
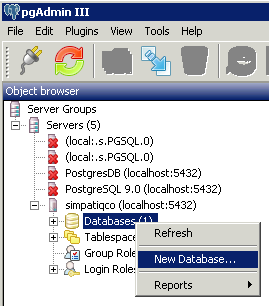
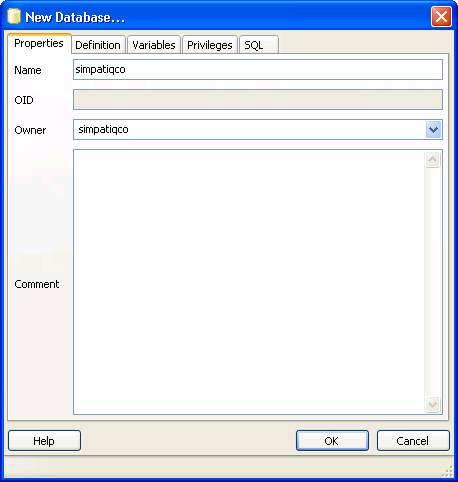
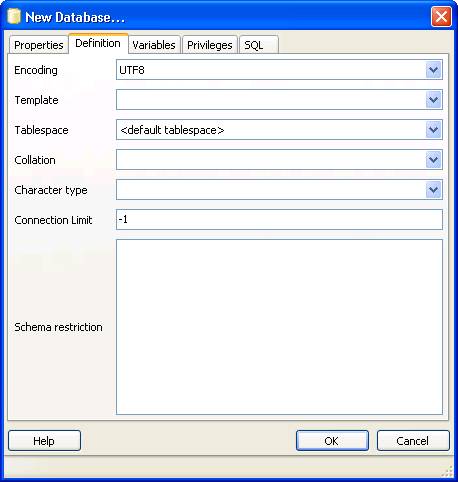
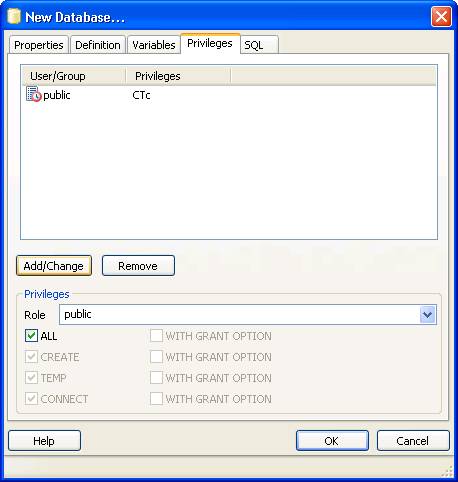
The installation progress takes some time, but should be no problem for a person with some IT-Knowledge. In short, you will install a PostgreSQL database and a package of an Apache webserver including PHP. You will then copy the SIMPATIQCO site (many PHP scripts and other stuff) to this server and do some minor configuration. We strongly recommend installing SIMPATIQCO on a dedicated PC, rather than on a computer that is also used for other tasks. First, output of server messages make it difficult to perform other tasks. Second, other programs installed on the PC, such as programs "listening" on port 80 which is required by the Apache server, are the main reason for installation problems. If you have any questions, please look at the FAQs or contact us directly.
The following settings must be applied:
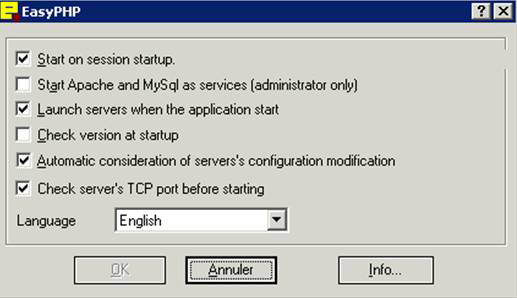
Note: If you already have a PHP/Webserver running and you are familiar with this system, skip the following steps and integrate Simpatiqco there. Please do not install easyPHP on a server where PHP and a webserver is already installed.
ServerName YOUR-IP-SERVER-ADDRESS-HEREDocumentRoot "D:/www" -Leave this as it is, if you use D:/www as your servers directory for your websites including SIMPATIQCO.<Directory "D:/www"> -Leave this as it is, if you use D:/www as your servers directory for your websites including SIMPATIQCO.

        $conf['root_url'] = "http://YOUR-SERVER/simpatiqco";
        $conf['root_dir'] = "d:/www/simpatiqco";
        $conf['log_dir'] = "d:/temp";
        $conf['logit'] = true;  //true is highly recomended
        $conf['graph_cache_dir']="d:/www/simpatiqco/temp_graphs";
        $conf['raw_dir'] = "d:/temp";
        $conf['ftp_dir'] = "d:/temp/ftp";
        $conf['hot_dir'] = "d:/temp/hot";
The following instructions apply to a SIMPATIQCO system with the following properties:
There are three methods to upload a file to SIMPATIQCO:
Navigate to the Raw files panel, select your instrument and click the "Upload new raw file" button. Since SIMPATIQCO needs to know how to handle the file and the resulting data, you have to choose a run-type by clicking on it. The site will reload and depending on your settings, the flash-upload area or a simple "browse" button will appear. You can choose the upload method (flash or ajax) in the "Settings" page. The picture below shows the flash-upload button.
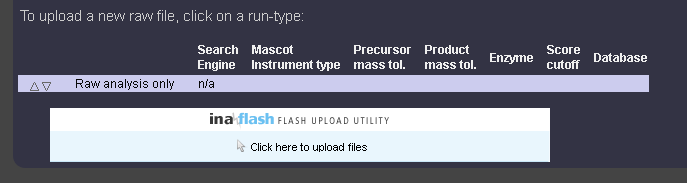
Click the flash utility and select your file to upload. Attention: Keep this windows/tab open in your browser while uploading. Otherwise the upload and further file analysis will fail. If the upload succeeds, the raw analysis and search (if available in the run-type) will start soon. The status will update automatically whereas the left icon represents the raw analysis and the right icon represents the search status.
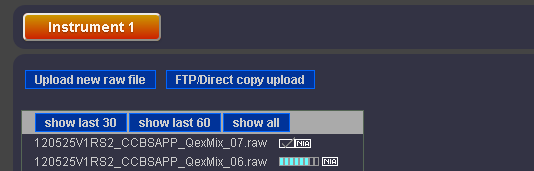
If you click "FTP/Direct copy upload" you will see a listing of all files found in the e.g. D:\temp\ftp directory. You can then check which files should be analyzed and which run-type should be used. This directory is set in the /simpatiqco/inc/conf.php file. You can set up a ftp server of your choice or use smallftp.exe which can be found in /simpatiqco/ftpupload. Set the default upload directory to your simpatiqco ftp directory and use a client to upload files to simpatiqco. If you have access to this directory for instance via a network share, it is also possible to just copy files to this directory. Please note that raw data files will be deleted from the ftp folder after processing.
The "FTP/Direct copy" functionality exists for two reasons: With this feature it is possible to upload/Launch multiple files at once and it enables you to upload huge files (>2GB) which could be a problem doing so over the web interface. Please keep in mind that some FTP-clients (e.g. firebug) have a built-in 2GB filesize limit. To ensure stability, it is recommended to process raw data in repeated batches of up to 30 files.
You can specify a "hot" folder in conf.php (described in the installation manual). On the settings page you will then be able to start the hot-folder "service". SIMPATIQCO will then in the hot directory create a directory structure for every instrument and will also monitor these diretories for any new files. Any raw file copied to one of these directories will be processed automaticaly. You just have to specify the run-type in the name of the raw file by using the term "rtidX". X is a number and the ID of the run-type (you can see the IDs of your run-types when opening the settings page, at the run-type/instrument assigning section). For example, a raw file named "1012_BSA_CytoC_rtid12_100min.raw" will be processed using the run-type having the ID 12. Raw files with no rtid tag will be ignored. Please note that raw data files will be deleted from the hot folder after processing.
This option alows a total automatic workflow since one can also automatically copy raw files to SIMPATIQCO when acquisition is finished.
See the FAQs how to do so.
Since there is no interface for this operation, one
has to add instruments manually. This is simple done by adding a line in the
SIMPATIQCO database. Open the tbl_instruments table and fill in the data
for the new instrument.
Required columns:
The name_long string will later appear in the SIMPATIQCO web interface. Note that the id is a primary key, so just count this
number up and do not delete lines. If you want to remove an instrument, just set the "active" column to false.
If there is a column named "dev", set its value to false.
The column "order" just regulates the listing of the instruments from left to right on the simpatiqco main site.
All other columns are optional. The columns "calc_statistic_period" and "run_type_ids" will later be filled when you go trough the settings and run-type settings.
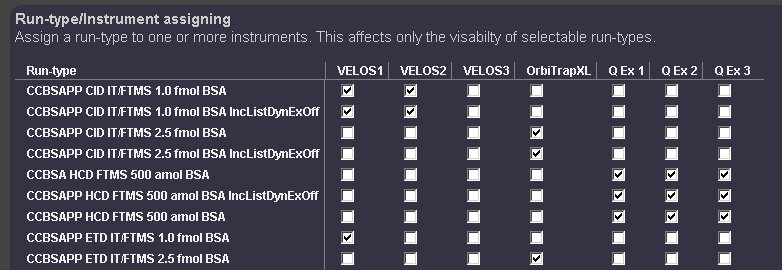
Each uploaded raw file will be analysed and the resulting data (raw file facts and search results) will be stored. To make these values comparable over time, the raw files need to be analysed in a certain way, which is not changing. The "run-types" hold these information, espacially the Mascot-search paramters. So each raw file is assigned to a certain run-type. Run-types can easily be created in the "Settings" page (see manual "Adding and removing of run-types" below). For better usability, the run-types can also be assigned to specific instruments. This has no impact on the statistic or what so ever, but is only a visual helper. For example, it is not necessary to make an ETD-run-type selectable for a non ETD instrument. This assigning is also done on the "Settings" page. The picture shows the self explaining matrix.
If your mascot-server connection works, you can add run-types with different search parameters. Navigate to the Settings pane, and scroll down to the Status area. If you see something like "Mascotserver: Connection OK" then your mascot-server is reachable. Scroll down to the "Run-type configuration" area, enter a Name for your new run-type, choose the settings available on your mascot-server, and click save.
The "Display in menu: group number" item, lets you choose in which group your run-type will appear, when a user clicks upload new raw file. This is just an optical feature for providing a better overview regarding the different run-types. There are 10 groups possible and each group can hold infinite numbers of run-types. If you want to move a run-type to another group or up/down within a group, just select it by clicking it, then two small arrows on the left will appear. An "OK" sign will appear on the left if your run-type was saved successfully. If not, check the input fields for possible implausible values e.g. letters in numerical input fields, or using a "," instead of a "." -depending on your mascot server settings.
It is not intended to ever remove a run-type, since every uploaded run is bound to the latter. Therefore, if you want to remove a run-type (make it disappear from the menu), just enter the SIMPATIQCO database, open tbl_run_types and set the active column to false.
On the Settings page you can create peptide lists to observe e.g. Retention times of certain peptides. Create a list (a peptide list is always bound to a certain run-type) e.g. "BSA peptides", then fill the list, by navigating to the search results. Click on the proteins which contain your desired peptides and click the "+" item. You will then be able to choose the peptide list which your peptide should be added to. To use your peptide lists, navigate to the Time-course Panel and select your run-type. If there are any peptide lists attached to it, they will appear, together with the available plots. If you click a peptide list, the corresponding plot for each peptide will appear for the last runs.
To observe certain values about a protein of interest over a long term e.g. the sequence coverage of Bovine Serum Albumin (BSA) in an everyday test run, you must tell the system, that you want to make e.g. BSA a protein of interest (POI). Do this by opening a search-result and click on the protein.

A little white diamond appears next to the protein name. When you click it, this protein will become a protein of interest for the run-type of this search result. It will be marked in green color from now on, and it will appear in the list of proteins you can select for monitoring long time values in the Database pane. If you want to remove the POI status from a protein, navigate to the Settings pane, scroll down to the Proteins Of Interest Pane, and find the corresponding cell (Protein name/Run-type) and click the X icon.
First thing to do, log on to your server, and look what happens when the simpatiqco web site is accessed. Watch out for any error messages. If your uploaded runs deliver no results or you get error messages which don't explain enough there are ways of debugging. First, check the temp directory (e.g.: D:\temp) and open upload_log.txt. This file contains info on the latest upload and should like this:
$_GET array: Array
(
   [instrument_id] => 5
   [run_type_id] => 24
)
$_FILES array:
Array
(
   [Filedata] => Array
   (
      [name] => 2012-02-15_100scans.RAW
      [type] => application/octet-stream
      [tmp_name] => D:\temp\php29E.tmp
      [error] => 0
      [size] => 3682034
   )
)
If this is the case, the upload of raw files is working. For further debugging open the corresponding log file (from today) in the temp directory. Also, log on to your server and upload a raw file. You will be able to watch the php scripts starting and working and read their output. This gives you a very detailed view at which point the system fails to analyse the raw file.If an uploaded run ends up with an error and the parameter "keep error file" (settings) is set to "yes" , the temp directory of this run will not be deleted. Look into the raw-file-temp-directory, where you will find a directory for every uploaded file (corresponding to the run id). Check if the created mgf and csv files have valid file sizes and try to open the raw file manually.
You can get a more detailed look into the process by manually starting a run analysis. To do so, make sure that you already uploaded a file which crashed when analyzed by simaptiqco. Now go to your simaptiaco server desktop and get the ID-number of this run and check in the simpatiqco-temp folder, if there is a folder named like this run-ID. E.g.: if your simpatiqco-temp folder is D:\www\simpatiqco_temp and the ID of the run in question is 1244, then there should be a directory D:\www\simpatiqco_temp\1244 (if the upload succeded). Now open a command line window and start the analyzing process: Use this command template:
php -c "C:\Program Files (x86)\EasyPHP-5.4.0RC4\apache\php.ini" D:\www\simpatiqco\inc\rawextractor.php 1244
NOTE: Adapt the above code to your settings. If you made a standard installation, then EasyPHP is in the Program Files (x86) directory and SimpatiQCo is on D:\www. The last paramter is the ID of your run. If the command succeeds, you can watch what happens and when exactly the analysis crashes.
PHP: Just make sure that you use a version >= 5.4
Apache: Config your apache httpd.conf like the one which comes with simpatiqco.
IIS: Please do follow the installation guide and install simpatiqco with apache. To run apache parallel to IIS open the apache httpd.conf and set the listening port to e.g. 8080. You can then contact simpatiqco by going to e.g.: localhost:8080/simpatiqco.
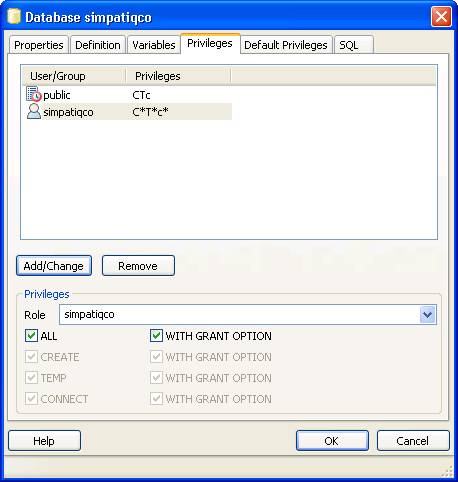
You can add any modification from your Mascot server as a variable modification in simpatiqco.
Firstly, create a runtype in simpatiqco which uses Mascot as search engine and save it. By default, no modifications are searched. If you want to add modifications to your search do the following:
Check which modifications your Mascot server provides (the exact string is necessary). You can do this in the Mascot search web interface (see screenshot below) or in every other program (e.g. Proteome Discoverer) which connects to your Mascot server.
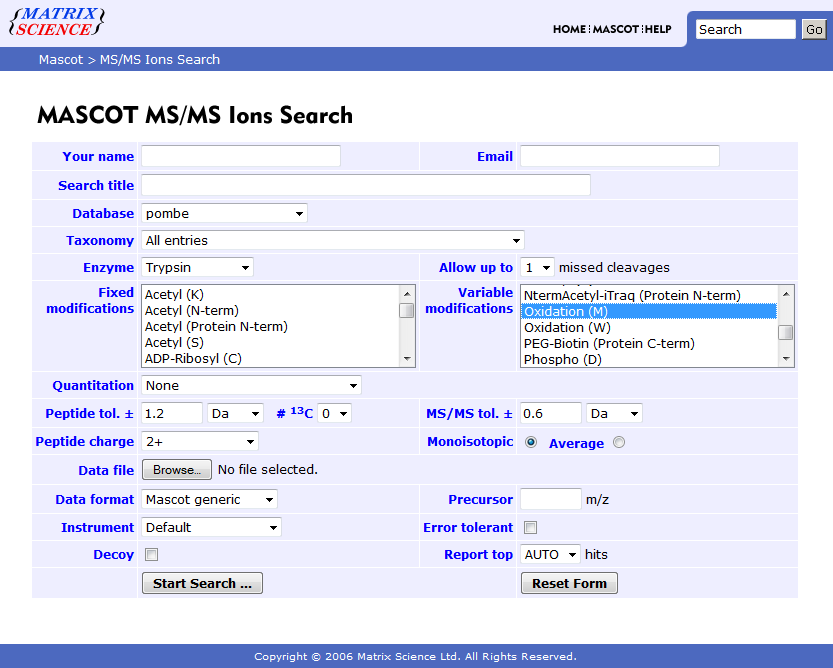
A modification string may look like this: Oxidation (M)
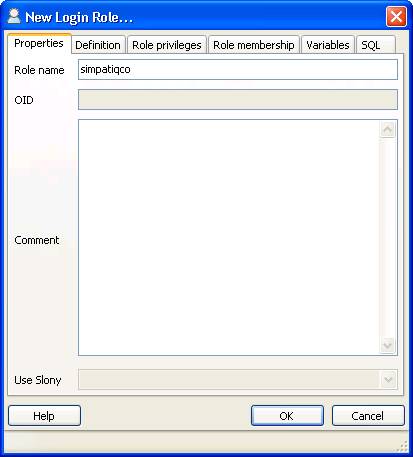
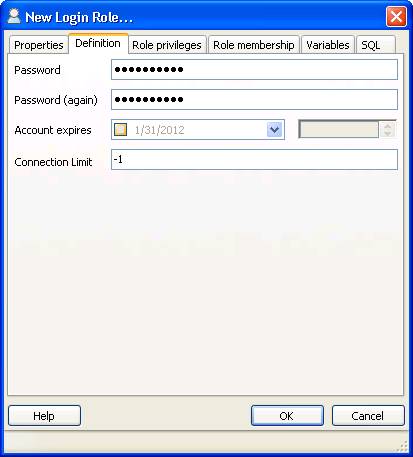
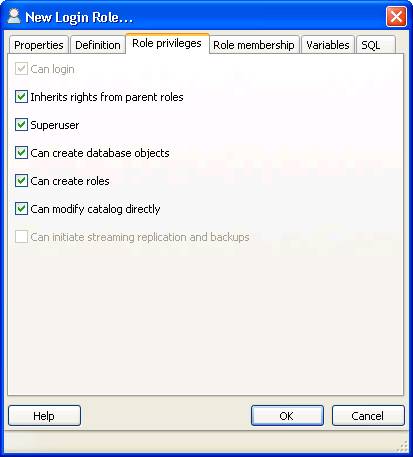
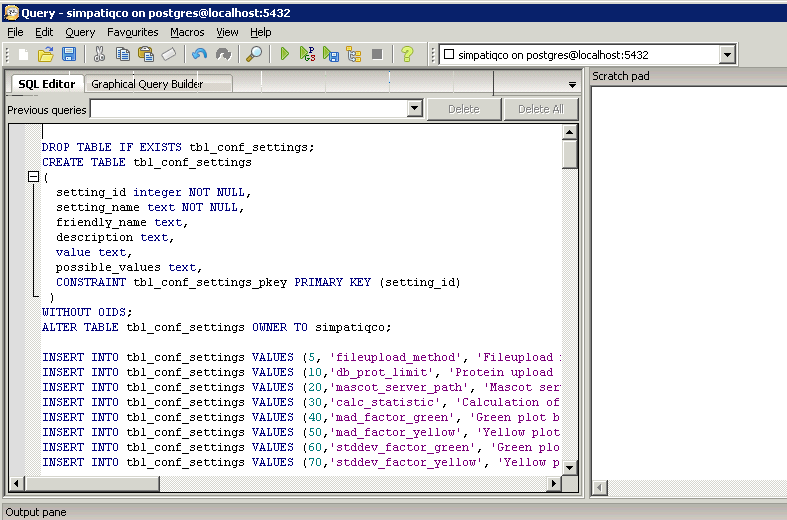
Now open pgAdminIII. Open the simpatiqco database and navigate to Schemas->public->Tables->tbl_run_types.
Select the table and click on "View the data in the selected object." in the top menue of pgAdminIII.
A table with the runtypes will appear. In the row of your runtype, go to the column 'mods' and double click in the field.
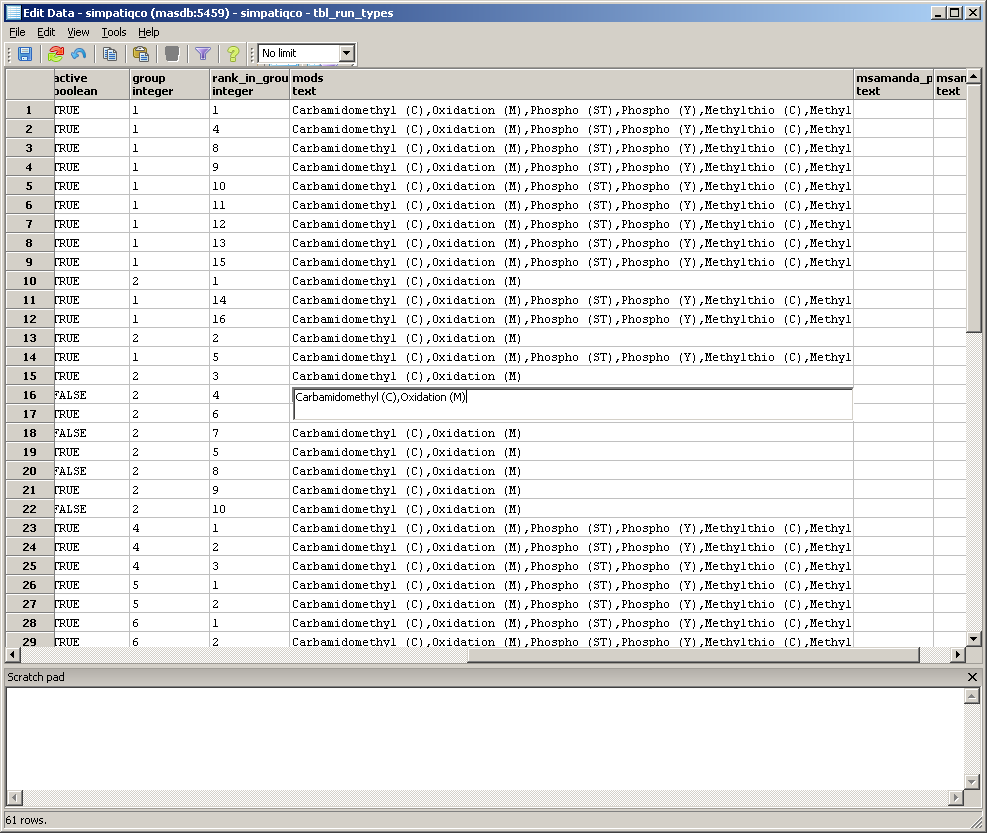
Now enter the modifications, use the exact modification string like on your Mascot server. If you add more than one, separate them with a comma.
Use no spaces between the modifications and don't append a comma at the end.
Press F5 to update the table and exit pgAdminIII.
That's it, every sample started with this runtype will be searched with the modifications you entered.
When starting a batch on your instrument, run a bat file when the acquisition is finished. Enter the path and name in the "post acquisition" field. For example: "D:\simpatiqco.bat %R". The %R will hold the raw file name.

The bat file can look like this:
d:\mpause.exe 20

copy "%1" \\YOUR-SERVER\hot\YOUR-INSTRUMENT

d:\mpause.exe 5
echo OFF

REM wait 20s so that raw file writing is complete before copying to hot folder

d:\mpause.exe 20


REM avoid spaces in path and file name and keep the length of the QC file name

REM constant, e.g. len(120201OT1_CCBSAPP04.raw) = 23

set m=%1%

REM keep file name but remove path

set m=%m:~-23%


REM "BSA" in the file name identifies QC run to be processed with run type id 2

set m1=%m:BSA=1%

REM copy file to hot folder, prefix rtid2 so that the file will be processed using run type id2 nethod

IF NOT %m%==%m1% copy "%1" "\\YOURSERVER\hot\YOURINSTRUMENT\rtid2_%m%"


d:\mpause.exe 5